Tools
CyberClaw
 By
By CyberBrick Plugin for OpenClaw
README
# CyberBrick Plugin for OpenClaw
<img width="1266" height="485" alt="Image" src="https://github.com/user-attachments/assets/0ea2467c-c2eb-4dac-a087-38ec377392f7" />
**Giving Life to CyberBrick Devices via AI**
**English** | [中文](./README_CN.md)
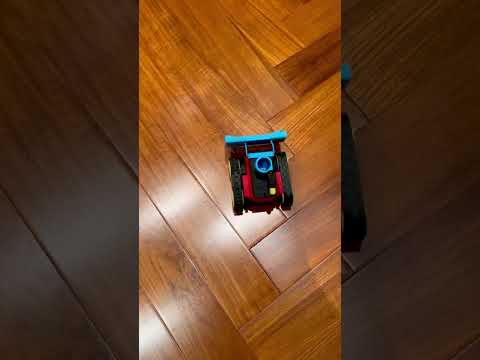
This plugin bridges the gap between [OpenClaw](https://github.com/openclaw) AI agents and [CyberBrick](https://cyberbrick.cn) hardware. It empowers any CyberBrick device (Mini T Tank, robotic arms, etc.) with autonomous capabilities, turning static hardware into intelligent, interactive companions.
## Demo
> Watch OpenClaw and CyberBrick transform a Mini T Tank into a free-roaming bot!
[](https://www.youtube.com/watch?v=vC2DL5KLIQE)
## Mission
Our goal is to **animate the physical world** through AI. By connecting CyberBrick's versatile hardware ecosystem with OpenClaw's powerful agent framework, we enable:
- 🤖 **Autonomous Behavior**: Devices that explore, react, and make decisions independently.
- 🎭 **Personality Injection**: Programmable "souls" like the "Hyperactive Kid" persona.
- 🔌 **Universal Control**: A unified driver interface for all standard CyberBrick pinout configurations.
## Architecture
<img width="1536" height="1024" alt="Image" src="https://github.com/user-attachments/assets/fa79e4f7-f09b-4be8-841c-b451a1fd066a" />
How your AI command travels from the cloud to the physical world:
```mermaid
graph TD
%% Nodes
User([👤 User / Feishu]) -->|Chat Command| OpenClaw[🧠 OpenClaw Agent]
OpenClaw -->|Invokes Skill| Driver[🔌 CyberBrick Plugin]
subgraph Computer [Your Computer / Server]
Driver -->|Serial / REPL| USB{🔌 USB Port}
end
subgraph Hardware [Physical World]
USB -->|Serial| Remote[🎮 CyberBrick Remote]
Remote -->|ESP-NOW Wireless| Tank[🤖 CyberBrick Tank]
end
%% Styles
style OpenClaw fill:#f9f,stroke:#333,stroke-width:2px
style Remote fill:#bbf,stroke:#333,stroke-width:2px
style Tank fill:#bfb,stroke:#333,stroke-width:2px
```
1. **User**: Sends a command (e.g., "Dance!") via Feishu/Lark or CLI.
2. **OpenClaw**: Processes the intent and calls the `cyberbrick-driver` skill.
3. **Plugin**: Converts the skill call into MicroPython code.
4. **USB**: Sends code to the CyberBrick Remote via Serial (REPL).
5. **Remote**: Executes the code and sends wireless commands (ESP-NOW) to the Tank.
6. **Tank**: Receives commands and moves its motors!
## Core Capabilities
This plugin currently provides the following skills:
1. **Universal Driver (`cyberbrick_driver/cyberbrick_driver.py`)**:
- Precise motor and servo control (1000Hz PWM).
- Standardized movement (Forward, Backward, Turn).
- Action triggers (Fire, Turret elevation).
- Full system diagnostics.
2. **Autonomous Wander (`cyberbrick_wander/cyberbrick_wander.py`)**:
- A "Hyperactive Kid" personality engine.
- Self-driven exploration with erratic, playful behaviors.
- Complex macro actions (Dance, Panic, Celebrate).
## Usage
### Hardware Setup
Before invoking any skills, ensure your hardware is ready:
1. **Prepare Devices**: You need a **CyberBrick Remote** (Transmitter) and a **CyberBrick Tank/Robot** (Receiver).
2. **Pairing**: Use the **CyberBrick App** to pair your Remote and Tank. Follow the [official guide](https://wiki.bambulab.com/en/cyberbrick) if needed.
3. **Connection**: Connect the **CyberBrick Remote** via USB to the **computer running OpenClaw**.
4. **Power On**: Turn on both the Remote and the Tank. Ensure they are paired (usually indicated by a solid LED).
### Invoking Skills
Skills are registered in `SKILL.md` files within each subdirectory and can be invoked naturally by OpenClaw agents.
**Example Prompts:**
- "Start wandering around."
- "Perform a dance routine."
- "Run a hardware self-test."
- "Move forward at full speed for 3 seconds."
> **Note**: The Agent communicates with the *Remote* via USB, which then wirelessly controls the *Tank*.
## Directory Structure
- `cyberbrick_driver/`: Contains the driver skill and low-level hardware abstraction layer.
- `cyberbrick_wander/`: Contains the wander skill and high-level behavioral logic.
- `README.md`: Project documentation.
## Installation & Configuration
### Prerequisites
1. **Python 3.x**: Ensure Python 3 is installed on your system.
2. **Dependencies**: Install the required Python packages.
```bash
pip3 install -r requirements.txt
```
## Skill Installation
To make these skills available to **all OpenClaw Agents** (Global Installation), or just for a specific project, follow the instructions below.
### Option 1: Global Installation (Recommended)
This will install the skills into OpenClaw's global skill directory, making them accessible to any agent in any workspace.
1. **Create the global skills directory** (if it doesn't exist):
```bash
mkdir -p ~/.openclaw/skills
```
2.1. **Clone the repository**:
```bash
git clone https://github.com/unbug/CyberClaw.git ~/.openclaw/skills/cyberbrick-claw
```
### Option 2: Agent Workspace-specific Installation
If you only want to use these skills in a specific **Agent Workspace** (the project directory the Agent is currently operating in).
1. **Navigate to the Agent's workspace root**:
```bash
cd /path/to/agent/workspace
```
2. **Clone the repository**:
```bash
mkdir -p skills
git clone https://github.com/unbug/CyberClaw.git skills/cyberbrick-claw
```
### Option 3: Development Mode (Symlink)
If you are developing these skills and want changes to be reflected globally without copying files.
```bash
mkdir -p ~/.openclaw/skills
ln -s $(pwd)/cyberbrick_driver ~/.openclaw/skills/cyberbrick-driver
ln -s $(pwd)/cyberbrick_wander ~/.openclaw/skills/cyberbrick-wander
```
## Registration
OpenClaw automatically detects `SKILL.md` files in its skill search paths (e.g., `~/.openclaw/skills/` or `./skills/`). No further configuration is usually required once the files are in place.
### Configuration
The CyberBrick Driver needs to know which serial port your device is connected to. It attempts to auto-detect the port, but you can explicitly configure it if needed.
**Option 1: Auto-Detection (Recommended)**
The driver will automatically look for devices with names like "CyberBrick", "usbmodem", "USB Serial", or "CP210". Just run the commands, and it should work.
**Option 2: Environment Variable**
Set the `CYBERBRICK_PORT` environment variable to your specific serial port.
```bash
# macOS / Linux
export CYBERBRICK_PORT=/dev/tty.usbmodem12345
# Windows
set CYBERBRICK_PORT=COM3
```
**Option 3: Command Line Argument**
Pass the `--port` argument when running the driver directly.
```bash
python3 cyberbrick_driver/cyberbrick_driver.py test --port /dev/tty.usbmodem12345
```
### Troubleshooting
- **Permission Denied**: If you get a permission error accessing the serial port, you may need to add your user to the `dialout` group (Linux) or check your driver settings.
- **Device Not Found**: Ensure the CyberBrick is powered on and connected via USB. Check if it appears in `ls /dev/tty.*` (macOS/Linux) or Device Manager (Windows).
---
*Powered by OpenClaw & CyberBrick*
tools


Comments
Sign in to leave a comment